Photo to vector art: stylized SVGs from your pictures
Want a portrait, product shot or travel photo as bold, poster-style art instead of a blurry enlargement? Drop it here and preview the stylized SVG for free before you decide.
Drop your photo here
Drag and drop an image, or click to choose a file.
Choose imagePNG, JPG, WEBP, BMP, GIF
The converter opens with the recommended settings below. Open the converter without a file
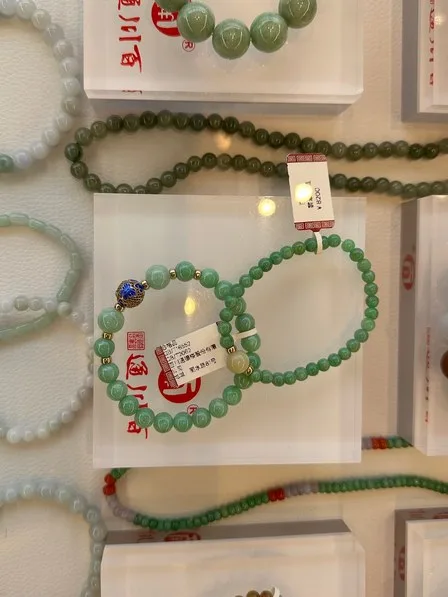
Original raster
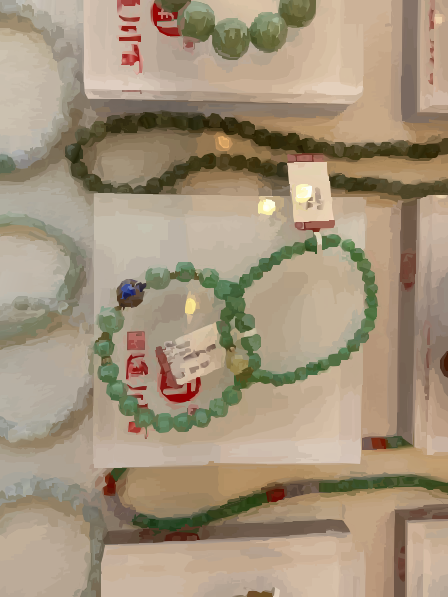
SVGR vector
How to turn a photo into vector art
- Choose a strong photo. A clear subject, good light and strong contrast give the boldest result. Busy backgrounds add clutter and file size.
- Crop it. Crop to the part you want. Every area you leave in becomes shapes in the file.
- Drop it in and pick a photo type. Drop the file above (PNG, JPG, WEBP, BMP or GIF, up to 15 MB). Photo is preset; switch to Portrait, Product, Scene, Night or Grayscale if one fits better.
- Tune Quality. Lower Quality gives bolder, flatter shapes and a smaller file. Raise it for more detail.
- Download. Converting and previewing are free and need no account. Downloading the SVG or PDF costs one credit.
Recommended settings
What photo to vector art actually looks like
Photo to vector art is a stylized result, not a copy. SVGR breaks the photo into areas of color and fits smooth gradients to them, so the result reads like a posterized illustration rather than the original pixels.
That's the appeal: the art prints as a large poster or goes onto stickers and merch without blurring, and it has a graphic look that a plain enlargement doesn't.
If you need an exact, photographic enlargement, use an upscaler instead. A photo to SVG conversion is never pixel-identical to the original.
What it's good for
- Posters and wall art with a bold, graphic style
- Stylized portraits of people, for gifts, profile images or event posters
- Stickers and merch art
- Backgrounds for web pages, slides and printed pieces
- Product shots turned into flat, illustrated graphics
Pick the photo type closest to your picture
Every photo type fits gradients to smooth areas. If a result looks off, try a neighboring type; the free preview makes it quick to compare.
| Image type | Use it for |
|---|---|
| Photo | General photos; the starting point |
| Portrait | Faces and people |
| Product | Objects shot on their own |
| Scene | Landscapes, streets and interiors |
| Night | Low-light and night shots |
| Grayscale | Black-and-white results |
File size and the Quality slider
Photos hold far more color detail than logos, and every patch becomes a shape, so photo SVGs are large and grow with detail.
Lower Quality gives bolder, flatter shapes and a smaller file. Higher Quality keeps more detail, but the file gets heavier and slower to open in editors.
A tighter crop helps too: less background means fewer shapes. For a portrait to vector conversion, cropping to the head and shoulders keeps the focus, and the file size, where you want it.
Need a cutout without the background?
Transparent background isn't offered for photo types, and transparent areas in an uploaded cutout come out white.
If you need just the person or product, remove the background in another tool first, so it traces as a plain white area. Then delete those white shapes, or clip the art to an outline, in Inkscape or Illustrator.
When not to convert a photo to vector
- Laser photo engraving. Engraving a photo is a raster job: laser software dithers the pixels into dots. Send the photo itself to your laser software, not a traced SVG.
- Photographic enlargements. If the result has to look like a photo, use an upscaler.
- Fine texture. Hair, grass and fabric are simplified into shapes, so expect a graphic look, not every strand.
- Gradient-sensitive tools. Photo results use SVG gradients, which cutting machines, laser software, Canva and screen printers often mishandle.
- Rights. Use photos you took or have permission to use, especially portraits of other people.
Frequently asked questions
Will the vector look exactly like my photo?
No. It's stylized vector art with posterized color areas and smooth gradients, not a pixel-identical copy. Check the free preview first.
How do I convert a photo to vector for a poster?
Pick the photo type that fits, keep Quality around 5 and check the preview; lower Quality gives a bolder, more graphic look. Then download the SVG or vector PDF and scale it to your poster size.
Can I turn a portrait into vector art?
Yes. Choose the Portrait image type and use a well-lit photo cropped to the face and shoulders for the cleanest result.
Why is the SVG file so big?
Every patch of color becomes a shape. Lower Quality, keep Merge paths on, or crop tighter for a smaller file.
Can I get a transparent background?
Not with photo types. Remove the background in another tool before uploading so it traces as plain white, then delete those white shapes in your editor.
Can I use this for laser photo engraving?
It's not the right tool. Laser photo engraving works from the photo's pixels, so send the original image to your laser software.
Can I recolor the result?
Yes. Each area is a shape you can select and recolor in a vector editor, though a detailed photo has many of them, and gradient areas need their gradient colors changed.
Related use cases
Prefer a short walkthrough? Read the tutorial: Convert Photo to SVG
Ready to convert?
Converting and previewing are free, with no account needed. Downloading the SVG or PDF uses one credit.